How to Deploy a Hugo Site to Firebase Using GitLab CI/CD
This article will guide you through setting up a CI/CD pipeline on GitLab to deploy your Hugo site on Firebase for free.
Introduction
Hugo is one of the most popular static site generators built in Go. It is very easy to get it up and running. There are lots of themes available to create your own blog, portfolio or company website. Hugo renders your content written in Markdown syntax into static HTML files that you can host on any web server or CDN.
Google’s Firebase Hosting provides a fast and reliable web hosting service with a generous free quota. It delivers your static content via its CDN servers around the world. You can connect your custom domain to your hosted site and it automatically generates and configures an SSL certificate for your domain for free.
We will be using GitLab for our Git repository and use its built-in CI/CD tool to deploy our Hugo static site to Firebase Hosting. On every push to our repository, we will trigger a pipeline to build our Hugo site and then deploy it to Firebase Hosting automatically.
Assumptions
We will assume that you have already created a GitLab project for your Hugo site and you have pushed your Hugo source files to the repository. If you need help creating a new GitLab project, click here. If you need help creating a Hugo site, click here.
We will also assume that you already have a Firebase account and you have created a Firebase project to host your site. If you need help creating a Firebase project, click here.
Setting up GitLab CI/CD
Before we setup our CI/CD pipeline, we will need a Docker image on which we will execute the build and deploy commands.
To build our static site, we need to execute the hugo command which requires Hugo to be installed on the container.
We will also need Firebase CLI to execute the firebase deploy command that will deploy our site to Firebase Hosting.
I have created a Docker image with both Hugo and Firebase CLI preinstalled that we will use for this purpose. The image can be found here. The Dockerfile of the image can also be found here. We will use this image for our CI/CD configuration.
In the root directory of your GitLab project, create a .gitlab-ci.yml file.
This file will tell GitLab what to execute on every push of your code.
The file should have the following content:
image: marzouka/hugo-firebase

deploy:
  stage: deploy
  environment:
    name: production
    url: https://example.com/
  only:
  - master
  script:
  - hugo
  - firebase deploy --token $FIREBASE_TOKEN
Don’t forget to change the environment url to your own site’s domain.
On every push to the master branch of your repository, GitLab CI/CD will execute the hugo and the firebase deploy commands inside the hugo-firebase container.
The hugo command will build your site and place the output in the public/ directory. the firebase deploy command will upload the contents of the public/ directory to Firebase hosting.
Firebase Authentication Token
Since we are running the firebase deploy command in a CI environment, we need to supply an authorization token to the command in order to deploy the site.
To generate the token, run the following command in the terminal on your machine:
$ firebase login:ci
If you don’t have Firebase CLI installed on your machine, please follow this reference to install it.
After running the previous command, a browser window will pop up asking you to login with your Google account associated with your Firebase account. After logging in, a new token will be generated and displayed in the terminal window.
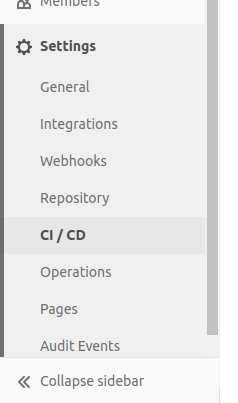
Now we need to add this token as an environment variable in the GitLab CI/CD settings. You can find the CI/CD Settings under the Settings menu of your project.
Expand the Variables section and click on the Add Variable button. The following form should appear.
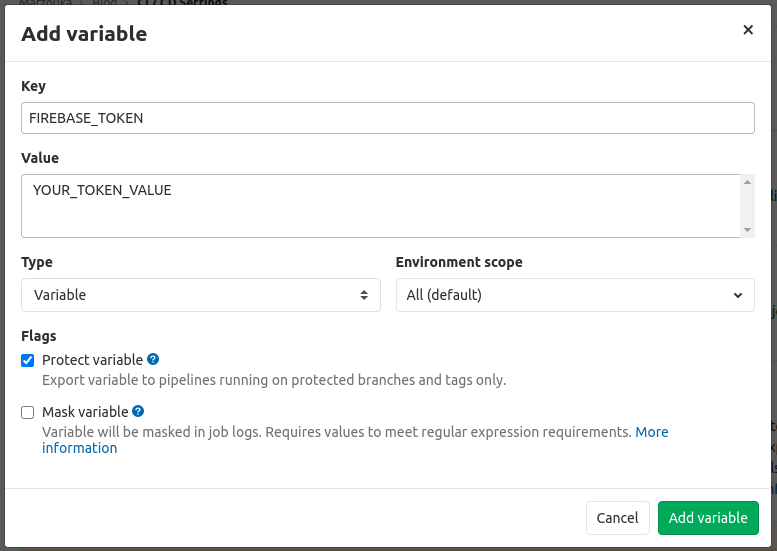
Enter FIREBASE_TOKEN into the Key field and enter the token value that you obtained from the previous step in the Value field.
Firebase Deploy Targets
Now we need to tell the Firebase CLI to which project to deploy our site.
To do so, you need to create a file named .firebaserc and add it to the root directory of your GitLab project.
Copy the following JSON content into the file and make sure to replace my-project-id with your Firebase Project ID.
{
  "projects": {
    "default": "my-project-id"
  }
}
Configure Hosting Behavior
You can customize Firebase hosting behaviour by adding a file named firebase.json to the root directory of your GitLab project.
In this file we will tell the Firebase CLI which files to deploy and add cache control headers to cache images, styles and scripts.
In this file you can also customize error pages, redirects, rewrites and other headers.
For full documentation about this file please refer to this document.
{
  "hosting": {
    "public": "public",
    "ignore": [
      "firebase.json",
      "**/.*"
    ],
    "headers": [
      {
        "source": "**/*.@(jpg|jpeg|gif|png|svg|ico|css|js)",
        "headers": [
          {
            "key": "Cache-Control",
            "value": "max-age=7776000"
          }
        ]
      }
    ]
  }
}
We’re done!
Now after pushing any commit to the repository, a new pipeline should run to deploy your site to Firebase Hosting. You can view the project pipelines under the CI/CD menu of your GitLab project.

If the pipeline fails for any reason, you can check the logs of the deployment task to debug the issue.
Feel free to reach out to me with any comments, questions, and feedback.